The popularity of Arduino microcontrollers and Raspberry Pi mini computers have turned more people into budding electronics hobbyists than ever before.
A lot of people will buy an Arduino or Raspberry Pi board and then wonder about all those little bits that come with starter sets and experimenter’s kits. Sure, you could wait until you have a starter kit in-hand to start identifying all those components, but why not know what they are before you need to?
Even if you have no interest in getting started with electronics projects or microcontrollers, it can be useful to know how to identify basic electronic components.
Advertisement
This is not a comprehensive guide, it’s simply offered as an introductory primer.
Arduino Microcontroller

Technically, Arduino and Arduino-compatible products, such as this Uno board, are not microcontrollers, they’re physical computing platforms. They’re based on simple Atmel microcontrollers, with the Arduino platform consisting of hardware and software components that help make the Atmel microcontroller ridiculously easy to use and program.
This is the standard form factor these days. There’s the microcontroller IC chip – the multi-legged component beneath where it says Arduini Uno. This one has an IC (integrated circuit) socket and removable Atmel IC. Others will have an SMD (surface mount device) IC soldered straight to the board.
There are a bunch of other components soldered to the board, such as a USB jack, barrel jack for power, rows of headers that allow for easy connection to the IC’s input, output, power, and communication pins, and a couple of indicator LEDs. There are additional components, but we’re not going there now. There are other references if you want to know exactly what’s what and what they do.
Starter Kit Assortments

Advertisement
Starter kits will typically come with a small selection of components needed to complete introductory products.
You will typically get:
- LEDs
- Resistors
- Capacitors
- A motor or two
- A servo motor or two
- Sensors
- Switches
- Prototyping essentials and accessories
Kit contents typically depend on the company. For example, you might get different component selections if you choose a kit from Adafruit, Arduino, Maker Shed, or Sparkfun.
Sometimes the components aren’t the best quality, but they’re usable.
LEDs

LEDs are light emitting diodes. Apply a small voltage and current, typically with a resistor in the circuit to help limit current flow, and LEDs will emit light of a certain color.
There are single-color LEDs, bi-color LEDs, LEDs with RGB (red, green, blue) color channels, and LEDs with programmable RGB output.
Beginners will typically work with single-color LEDs, with white, blue, red, green, and/or yellow color options. There are different sizes, with 5mm LEDs being most common and practical. Some larger starter kits will also come with an RGB LED or two.
LEDs are also polarized (directional), meaning that they only allow current to flow in one direction. Because of this, LEDs will often have a longer lead for the anode (+) side, and shorter lead for the cathode (-) side. The cathode side will typically also have a flat spot. When in doubt, refer to a datasheet or instruction guide that comes with the components.
Diodes

Diodes that don’t emit light can also be useful. There are other types of special-purpose diodes, but you typically won’t see them in a starter kit.
Diodes, including LEDs, are semiconductor elements.
Resistors

Resistors are components that resist the flow of current. They’re used to reduce current flow and also to lower voltage levels in a circuit. There’s a color code (Wiki) that helps you read resistor values.
Resistor values are measured in Ohms. You might also want to learn Ohm’s Law, which is V = IxR. The voltage drop across a resistor is equivalent to the current flow times the resistance value. Or, you could consider I = V/R, or that the current flow is equivalent to the voltage divided by the resistance.
Let’s say you have a 6V battery source and an LED with a forward voltage of 3V and current draw of 20mA (milliamps). You will need a 150 ohm resistor in order to limit the current so as to not burn out the LED. In this case, V = (6V – 3V), I = 0.020 A, and R = V / I = 150 Ohms.
The voltage across a resistor and current flow through it are directly proportionate. If you know what the voltage drop across a resistor will be (6V – 3V = 3V in this scenario), then you can select the resistance value so as to limit the current flow. Since the current flow through a circuit will be the same for components connected in serial (end-to-end) arrangement, then the current flow through the resistor will determine the current flow through an LED.
There are plenty of LED current-limiting resistor calculators out there, and many thorough explanations as to why you must typically use a resistor with an LED.
Capacitors

Capacitors are special components that are used to store energy. You can think of them as small temporary batteries if you like, but their function is not quite that simple.
There are different types of capacitors, but you will often see ceramic capacitors, which are small orange or blue discs with leads, and electrolytic capacitors, which are polarized. Electrolytic capacitors often have a stripe to denote the negative side, or a (+) to denote the positive side.
Capacitor values are measured in Farads, with values typically in the nanoFarad (nF) and microFarad range (µF).
Potentiometers

Potentiometers, also known as rheostats, are variable resistance components. There are different styles, based on how adjustments are made. This one is a rotary potentiometer, which can be adjusted by turning the shaft. You could also turn it with a screwdriver or attach a knob for greater finger-turning comfort.
There are also slider potentiometers, where adjustments are made by sliding a knob or stem along a linear path.
Resistance in a potentiometer can change linearly, but there are also ones with special scales, such as for audio applications and volume control.
Rotary encoders look like potentiometers, but they work differently and aren’t resistors at all. Rotary encoders must typically be used with a microcontroller.
Special Resistors
With a potentiometer, the resistance changes based on user input. There are special resistors where resistance can be determined by environmental factors. Here are a couple of special resistors that you might find in a microcontroller or electronics starter kit.
Photoresistors

Photoresistors, or photo cells, are light-sensitive resistors. You have probably seen these in nightlights, where photo cells are used as sensors to determine whether the nightlight should turn on or not.
Thermistors

Thermistors are temperature-sensitive resistors. They can be used as sensors, such as to trigger a shut-off event when a temperature threshold is reached, or as the basis for simple thermometers.
Force Sensitive Resistors

Force sensitive resistors vary their resistance values depending on the amount of pressure on their sensing area. The greater the force, the lower the resistance. These resistors are often used as sensors that can report whether they’re being pressed or not pressed.
Transistors

Like diodes, transistors are semiconductor devices. They are often used to amplify or switch electronic signals and power.
Integrated Circuits
Integrated circuits, or ICs, are small self-controlled circuits with specific functions.
One of the more popular ones you might use with a microcontroller is a 7805, which is a 5V voltage regulator. Voltage regulators, power transistors, and other components can sometimes require heatsinks to perform safely and properly.
Another popular IC for beginner projects is the 555 timer, which as the name suggests provides timing-related functionality.
Motors and Servos
DC Motors

A beginner kit wouldn’t really be complete without a simple DC motor. These are typically low-voltage and low-power motors.
Higher-powered motors are typically more than what an Arduino, Raspberry Pi, or other all-in-one programmable board can handle by itself. In that case, you will typically need an H-bridge or other motor control and power circuitry. But for these smaller motors, nothing extra is typically needed.
Servos

Servos are a little different. They have three connections – two for power and one for a digital signal.
Servos contain small DC motors, gears, and control circuitry. Their output shafts are toothed and typically work with plastic (or metal) servo horns or other servo accessories.

Servos typically have limited rotation range, such as 90° left and right from the center point, unless specially designed or user-modified.
Servos are used when you want better control over angular positioning. The signal that gets sent to a servo determines the angle the output drive rotates to.
Vibration Motors

Vibration motors have shafts with small off-balance weights. The result is exactly what you would expect – these motors, and whatever they’re mounted to, vibrate. This one has an output shaft, others are completely self-contained.
Battery Holders

Battery holders sometimes come with bare leads, other times they come with solderable connectors, some come with pre-attached barrel jacks or other connectors. They can often work with alkaline or rechargeable AA, AAA, or 9V batteries. Larger battery packs hold C or D batteries, and there are smaller ones as well.
Breadboards

Breadboards are used for circuit prototyping and are a non-permanent way of hooking things up. You can use them with through-hole components, small solid-core wires, and breakout boards with male headers or pins with 0.1″ spacing.

There are multiple rows of metal clips, which the (+), (-), and numbered rows all being connected on either side. The voltage rails are on either side are not connected to each other, but a jumper wire from one side to the other can easily change that.
All the 5 holes/receptacles in each row are connected to each other. In other words, for each numbered row, holes A through E are all connected, as are holes F through J. But none of the pins in A thru E or F thru J are connected.
For instance, a component inserted into hole 1-A will be conductively connected to a component inserted into row 1 pin B, C, D, or E.

The clear-bodied breadboard above is what I would call a full-size breadboard. There are also half-sized breadboards and miniature breadboards, such as this small blue one. There are also larger and huge breadboards that are used for incredibly complex projects.
The clear breadboard above has 830 tie-in points – 630 in rows of 5, and 200 for power rail connections. Half-sized boards have 400 tie-in points (300 in rows of 5, 100 for power rail connections), and these miniature breadboards have 170 tie-in points.
Some breadboards are connectable via notches and pegs on their sides, and many come with adhesive mounting pads that you could mount them to other worksurfaces or prototyping areas.
Jumper Wires

Older-style jumper wires were stiffer and had right angle connections that made them looked like large colored staples. Those jumper wires are still available, but flexible jumper wires such as those shown here have become much more popular.
Starter sets will often come with basic quality jumper wires, and you could buy better ones down the road.
Heatshrink Tubing

Heatshrink tubing is a preferred alternative to electrical tape when you need to cover up a small soldered connection, wiring splice, quick connect terminal, or other wiring feature.
Switches

Switches come in very many shapes, sizes, and styles. These are all microswitches that can pop into a breadboard for easy use. They can also be soldered into small PCBs with breadboard-compatible pin layouts.
Breakaway Male Headers

Male headers are small lengths of wire, sometimes with shorter or longer lengths on opposite sides of a plastic housing, that make it easy to plug small breakaway boards into a breadboard, PCB (printed circuit board), or female headers.
Breakaway boards are small PCBs that make it easier to connect small IC chips or other self-contained circuits into a project or prototyping breadboard.
You can also solder male headers to a PCB for use with female jumpers or plugs.
Headers sometimes come pre-cut, but breakaway headers are more flexible and sometimes more economical, as they allow you to break off as many or as few pins as you need for a project.
Female Headers

These wrapped female headers are meant to be soldered into a breadboard, where they will provide handy sockets to plug jumper wires, components, and male headers into.
Some have short leads, for use with a PCB, others have longer leads that pass through PCB holes, allowing them to be used as female receptacles and headers on one end, and male headers on the other that can be plugged into another circuit.
ProtoBoards
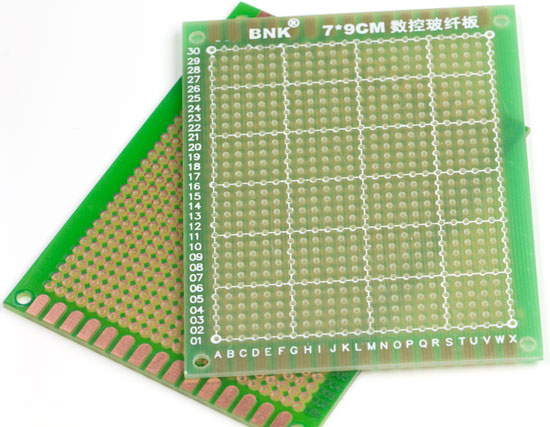
ProtoBoards, which sometimes go by other names, are available in a wide range of sizes and styles. They allow you to easily transfer a circuit from a breadboard into a more permanent setup. These boards require that components be soldered into place and sometimes require jumper wires to help create a neat and continuous circuit.
You could also design your own custom PCBs and have them sent to a small-scale manufacturer, or you could cut your own with a small CNC mill, but this requires more advanced skill, experience, as well as a bit of trial-and-error. ProtoBoards are simply easier for most beginners and intermediate electronics hobbyists and tinkerers.
LCD Character Displays

LCD character displays help to visualize outputs from a microcontroller. They often require a lot of digital pins, but some companies make “backpacks” that help to reduce the number of required connections. LCD display backpacks, or breakout boards, often make use of other digital communication methods. There are plenty of online tutorials and “getting started” guides to help you learn the ropes.
LCD displays come in many sizes and styles, and in addition to character displays, there are ones that can be used with video outputs, similar to computer and smartphone displays. You could also choose from a growing number of small touchscreens, but that’s generally beyond beginner territory.
Speakers

Speakers for electronics projects come in many shapes and sizes, and are typically used for very low-powered audio applications. Larger speakers require separate power and amplification circuitry.
Tilt Sensors

Starter sets sometimes come with additional sensors to play around with, sometimes they don’t. This one came with two tilt sensors, which are simple and inexpensive devices that sense movement.
Piezoelectric Buzzer

Piezoelectric buzzers are devices that you use when you need a simple audio indicator of some kind. The “remove seal after washing” sticker is covering up a hole.
Even More Electronics Components
The components shown and described here are the basic building blocks you might need for your first electronic circuits. There are many more types of electronic components you might find useful, and also a lot more variety of the types of components discussed here.
If you have any questions about these or other components, I’ll try to help, or I could at least try to point you in the right direction.
Bill K
Great introductory article Stuart. Best comprehensive baseline review I’ve seen. I’ve been interested and amazed in the capabilities of these platforms, but haven’t decided on a which platform (Arduino, Raspberry Pi or even Beagle Bone) to commit to.
Deviously I gave a Raspberry Pi ultimate starter kit with camera to a tech friend for Chrstmas, just to see what he does with it. He’s all psyched to get started.
For me I feel like I need to define a project before deciding on a platform as their capabilities are a different……… which I’m just beginning to appreciate. I look forward to reading and learning more from you and ToolGuyd readers.
Stuart
Thanks! I’ve actually been meaning to do this for a while, and took these photos more than 2 years ago.
I started with Arduino, and will continue to work with the platform, but also picked up a Raspberry Pi in the Fall that I’m starting to get into.
Well, I started with Parallax’s Basic Stamps, but that was years ago and when I was ready to get back into microcontrollers and programmable platforms I resumed with Arduinos.
Arduino and Raspberry Pi are completely different though, and so it wouldn’t hurt for you or anyone else to try one platform and then the other. Sometimes they can be made to work well with each other too.
Benjamen
One nit-picky correction. A potentiometer can be used as a rheostat, but is not a rheostat. A rheostat has only two terminals and is a variable resistor. A potentiometer is typically used as a variable voltage divider.
If you ask for a rheostat and get a potentiometer it’s not a big deal, but if you ask for a potentiometer and get a rheostat you’re not going to be happy.
Stuart
True. I didn’t really want to get into the difference because, for most intents and purposes, beginners will be using potentiometers.
I don’t think I’ve come across a rheostat outside of an educational environment, where we used huge variable resistors and decade boxes instead of through-hole resistors.
Mike
Another nit-picky correction. A 7805 is an integrated circuit, not a transistor. There’s a lot more going on in there than just a single semiconductor.
Stuart
Good point, thanks! I must have been aware of this at some point, but not when I was writing up the post. Not everything with a TO-220 transistor-type package is a transistor.
JG
I always wanted to learn making things with Arduino but it seems daunting and I can’t quite figure out how to start.
Stuart
It doesn’t need to be daunting. Arduino is a VERY beginner-friendly platform.
There are 2 ways to start. One way is to buy a starter kit and work through the introductory circuits. The second way is to figure out a small project and learn how to do what you need to do that way. You could buy the same starter kit for either route, or piece together the components you need separately.
Marc Liyanage
Great article! I was wondering if you have a source for female headers that have the break-off divisions between each pin. This seems to be common on the male headers, but very hard to find on the female ones.
Stuart
I have seen ones that look like breakaway pins and are easier to cut, but I don’t think they’re intended to be separated in a similar manner as male pins. Plus, they’re often pricier – some have higher precision round holes.
Some places advertise breakaway female headers, but they’re actually regular female headers that the distributors encourage users to cut to size.
Mike
Mouser and DigiKey will both have them, along with the other major supply houses. Go to their websites and request print catalogs from both of them. The items will be in their online catalogs but with so many different items of this type it’s hard to find what you want from them.
Today while I’m shirking at work I’ll try to look up some part numbers, but no promises.
Farid
Here are some search results from Digikey for headers. Checkout the 3M ones which you can successfully cut.
http://www.digikey.com/product-search/en?FV=fff40016%2Cfff802f4%2C1140050%2C1640001%2C1680001%2C9340019%2C934001a&k=header&mnonly=0&newproducts=0&ColumnSort=0&page=1&stock=1&pbfree=0&rohs=0&quantity=&ptm=0&fid=0&pageSize=25
Caution: What is typically found when searching online are actually machined pin single row IC sockets. They are available in length up to 40 pins and can be readily cut. The standard headers are typically made of more brittle plastic not as easily separable (even the ones that appear scored), but can be cut often at the cost of one pin. Sockets are for use with ICs, and even though they can accommodate pins 0.03″ diameter or less or .025″ square pins, the insertion depth is very limited. I use them when prototyping circuits as I can create any IC socket length needed.
You can get some here through Amazon: http://www.amazon.com/gp/product/B00RFI1WK2/ref=ox_sc_act_title_1?ie=UTF8&psc=1&smid=A3UVGO6W43MISJ. From experience, it might take 3 weeks for delivery though, but the cost for 10 is about the same as one from Mouser or Digikey.
Bill K
Stuart,
Are the quality of the Ardunio and Raspberry boards and the related add-on components all of good quality (despite the vendor), and/or do you have a recommended vendor list?
Stuart
If you get official Arduino and Raspberry Pi boards, yes. Some companies make Arduino-compatible boards that vary in quality. There are knockoffs, so stick to known distributors and avoid places which have prices that are too good to be true.
You’d probably want to start with an Arduino Uno.
Arduino-compatible boards can be good, but one brand I tried (it came with a kit) has issues with my computer.
Phil
You might want to give the BeagleBone board a try along with the RPi and Arduino. I’ve been playing with all three for a while now, and each has their own unique strength and weaknesses. The Ard is a wonderful, basic microcontroller, you load it with code and let it rip in your design. There’s no live user interface for the most part, and if you bungle your code, you’ll know this when you have it running in your project,
The Pi is a standalone mini computer, you connect your keyboard, display and maybe a mouse and work with it on its own terms. The Pi is a bit limited on I/O, but it’s versatility lets you get beyond those limitations.
The BeagleBone stands out because it is a fully contained Linux microcomputer with more I/O than the Pi and Arduino combined. Getting started with the Bone is beyond easy. Take it out of the packaging, plug the USB cable into it and plug the other end into your PC. In this mode it gets power from the PC, boots up and becomes an attached mass storage device. Browsing the device you will find the remaining drivers needed to complete the interface with the Bone. The documentation, drivers, help and everything else is completely contained in the device. Once the drivers are loaded, you connect with it using a browser through a virtual ethernet port, from there you can launch the integrated IDE and begin programming. On the rather extensive internal webserver you’ll find lots of ready-to-run demos, links to more involved stuff and whatnot. If you really want to learn and tinker with the nuts and bolts of Linux (they come with a Debian distro) just SSH to the thing and you’ve got a complete mini mainframe at your disposal. The Bone is also able to work entirely standalone as well, similar to the RPi. It’s the most sophisticated of the three, but for only a few more dollars.
All of these platforms can be outfitted with specialized and general purpose external modules. Once you get the knack of what these tiny computers/controllers are capable of, and how remarkably easy they are to work with, you’ll get addicted.
Bill K
@Phil I understand BB is the most expensive board. I’ve read that BB additional capabilities prevent the need for other add on options resulting with the end project cost being very competitive if not better than other boards. Is this your same experience?
Also do you have any preferred BB vendors?
Stuart
I would suggest Sparkfun and Adafruit. Their product catalogs are more beginner-friendly than Digi-Key, Mouser, and other huge parts suppliers.
You’ll often spend more at Sparkfun and Adafruit than for the same parts found at Digi-Key and elsewhere, but their product catalogs are much smaller and they provide tutorials and guides for many of them.
Make Magazine’s Maker Shed should also be good, but I haven’t ordered from there yet.
Phil
I have gotten my BB bits from Adafruit and Element14. Element14 sell their own versions of the open source BB and BB Black along with some really nice dev kits and peripherals for surprisingly low cost though a company called WaveShare, and if you are willing to wait a bit for a slow boat from China (no more than a week or two, really), they are a good choice. I’m very satisfied.